When I hear the term "worm compost" it brings back memories of a friend who used to use the term "worm dirt" as a way to describe someone less than desirable. Whether you use the term worm compost, worm dirt, worm castings or worm poo, all are referring to the same thing : Vermicompost!
 |
| Worm Factory 360 Cover |
 |
| The Worm Factory Composting Accessories (included) |
"Vermicompost is the product or process of composting using various worms, usually red wigglers, white worms, and other earthworms to create a herterogeneous mixture of decomposing vegetable or food waste, bedding materials, and vermicast. Vermicast, also called worm castings, worm humos or worm manure, is the end-product of the breakdown of organic matter by an earthworm. These castings have been shown to contain reduced levels of contaminants and a higher saturation of nutrients than do organic materials before vermicomposting. Containing water-soluble nutrients, vemicompost is an excellent, nutrient-rich organic fertilizer and soil conditioner. The process of producing vermicompost is called vermicomposting."Wikipedia
 |
| Worm Factory 360 base and cover |
Recently I was given the opportunity to take one of these vermicomposters for a test drive and it is living up to its promise and beginning to produce some yummy..er.. worm dirt!
Well my vegetable plants will sure think so!
The composter I am using in the illustrations below, is the Worm Factory 360 sold at Rainbow Worms. In a later post, I will do a more thorough review but for now I wanted to show you all just how easy this unit is to set up.
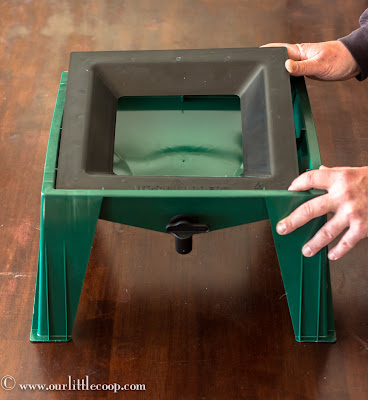
The first step in assembling the Worm Factory 360 is to drop in the "worm ladder". This piece is critical to ensure any worms that fall through the bottom tray of the composter can crawl back up to its food source.
 |
| Installing Worm Factory 360 "worm ladder" |
 |
| (4) Trays come with the Worm Factory 360 |
The Worm Factory 360 comes with 4 trays which will be added as time goes by. In the beginning, you only need to put down one. The first tray fits perfectly into the Worm Factory base.
 |
| Placing first tray onto Worm Factory base |
We now need to add a base layer, bedding, and food. (Think lasagna) First down is 2 layers of news paper. After neatly placing the layer of newspaper in the tray of the Worm Factory 360, you will need to add the bedding.
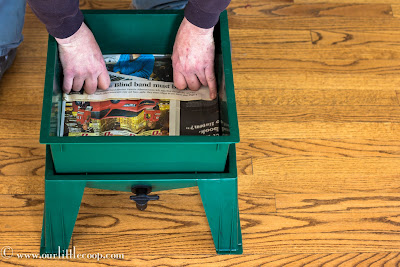 |
| Adding (2) layers of newspaper in bottom of tray |
A coir brick is included in the supplies and you will need one half to start with.
 |
| Break apart coir brick |
To ready the coir brick for your Worm Factory, you will need to let it soak in approximately 3 cups of warm water and aid in breaking apart the fibrous material with your hands.
 |
| Soak and break up |
Tightly squeeze out any excess water from the coir.
 |
| Wring out water |
Evenly spread the moist coir on top of the newspaper base.
 |
| Spread a layer of wet coir to Worm Factory 360 tray |
The next step is to add some pumice to the bedding. I sprinkled it evenly over the coir and lightly mixed it in.
 |
| Sprinkle pumice on top of coir |
Adding a mix of your own semi-composted material is advised. Although you will be adding food scraps for the worms to feed on, this will be an alternative source they will appreciate. If you do not have any compost, go outside and look under some old bushes, in yours or a neighbors yard, and you will likely find some old leaves from the previous Fall.
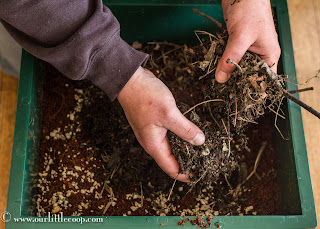 |
| Add organic material |
 |
| A good source of organic material can be found in old leaves under your bushes. |
Now is the time to add your first supply of kitchen food scraps. The manufacturer recommends initially putting it into 2 corners (as pictured).
 |
| Add kitchen scraps to the Worm Factory 360's corners |
 |
| A mix of old greens, banana peel and finely chopped carrots |
The next and final step in assembling your Worm Factory 360 is to add a layer of shredded paper. (Again this is provided)
 |
| Add a layer of shredded newspaper to your composter |
Ready for the fun part!? We get to add the worms! There are a couple options for worms on the Rainbow Worms website, but from my research, the best are he Red Wigglers.
(purchased separately)
 |
| Red wigglers going in! |
Slowly add the worms into the center of the tray.
 |
| Place worms in the center of the tray |
After all of your worms have been added, gently cover them with some of the shredded paper.
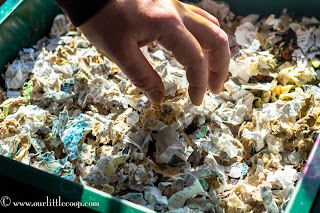 |
| Tuck your worms in and leave them be for 3 days. |
Place the cover on your Worm Factory 360 and walk away. Let nature take it course. In 3 days, you can remove the cover and check on the progress of your worms. By this point, they should have all moved from the center and to either of the two corners with the food scraps.
 |
| Follow up with your worm compost in 3 days to make sure all worms have moved towards the kitchen scraps |
As with gardening, composting with worms takes a little bit of time but the payoff is huge. The vermicompost I eventually harvest will be used in a compost tea brewer. Another great way to use it, is to lightly scratch into the dirt around your trees, ornamentals and any other plants and veggies you have growing. At a later date, I will follow up with my progress.
Cheers ~ Kevin
*Update June 15, 2013
 |
| Update on my Worm Factory 360 June 13, 2013 |
To purchase your own Worm Factory 360 contact:
 |
| RAINBOW WORMS |
Toll Free 877-280-5665
Rainbow Worms
1119 Via Los Trancos
San Lorenzo, CA 94580


.jpg)


I do my worm tower a bit different. Instead of the coir, I had some peat and mixed that in.
ReplyDeleteI first put a layer of shredded newspaper down in the tray first, then the kitchen scraps, then the peat, then another layer of shredded newspaper, finally topped off with water to make it moist.
Absolutely love the worm tower!
Peat would be an awesome alternative and probably one I will use from here on out. How do you use the worm castings? Have you tried a compost tea brewer? I will be doing a product review on one here very soon so stay tuned..... The company that sent it was Titan controls. It is called the Flo n' Brew. Good talking with you Mike!
DeleteSorry it took me so long to get back to you on your question. I take my castings on spread them on top of my garden beds around my plants when they are planted, and when they are not planted, simply mix it in with my soil.
DeleteI have not tried that compost tea brewer , but I have brewed compost tea in a 5 gallon bucket.
Better late than never! :) You should give it a try. If you have the kelp meal (found in gardening centers) it makes a powerful punch when added to the casings. I have heard of folks brewing in the 5 gallon buckets as well, using a fish tank aerator
Delete