Sunday, December 4, 2016

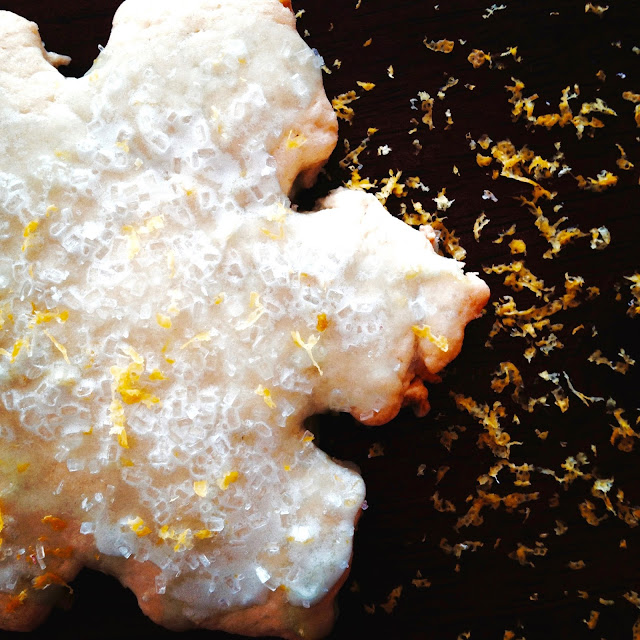
Snowflake Sugar Cookies With Essential Oil Lemon Glaze


Ingredients: 

Cookies:
  • 1 1/2 cups softened butter
  • 2 cups white sugar 
  • 4 eggs 
  • 2 teaspoons vanilla extract 
  • 5 cups flour 
  • 2 teaspoon baking powder
Glaze:
  • 2 cups powdered sugar 
  • 4 drops of certified pure therapeutic grade essential lemon oil 
  • 1 lemon zested 
Directions:

Cookies:
  1. In a large bowl cream butter and sugar, beat in eggs & vanilla, stir in flour and baking powder.  Cover and chill for a minimum of one hour. 
  2. Preheat oven to 400 degrees and roll dough approximately 1/2 inch thick on a floured surface and use cookie cutters to cut your shapes. 
  3. Bake for 8-10 minutes and allow to cool completely.
Glaze:
  1. Mix powdered sugar, lemon essential oils and lemon zest in a small bowl.  
  2. Allow cookies to cool completely and spread glaze over the top with a brush.  Sprinkle with clear sprinkles if desired.  

Friday, April 29, 2016

Springy Things 2016

Despite it being April and the temperatures hovering around 45 degrees, I am still clinging on to the little touches of spring that are popping up around us.


Wednesday, April 27, 2016

Poblano & Corn Lasagna


RECIPE <---Click There.

I made the recipe EXACTLY as it's written BUT used queso fresco instead of the suggested mozzarella.

Tuesday, February 16, 2016

Botanical Interests Heirloom Tomato Seed Collection Giveaway


For years we have been using Botanical Interests seeds and every year they have proven to be our absolute favorite.  We are about a week away from starting our tomato seeds and in celebration will be giving away THREE Botanical Interests Heirloom Tomato Seed Collections to three lucky winners! Here is what is included in the Heirloom Tomato Seed Collection:

Heirloom Tomato Seed Collection

Lycopersicon lycopersicum

Item #4523
A collection of heirloom tomatoes with wonderful old-fashioned flavor.
Tomato Cherry Red & Yellow Pear Organic (30 Seeds)
Tomato Pole Beefsteak Organic (30 Seeds)
Tomato Pole Black Krim Organic (30 Seeds)
Tomato Pole Brandywine (30 Seeds)
Tomato Pole Cherokee Purple Organic (30 Seeds)
Tomato Pole Pineapple (30 seeds)
Tomato Pole San Marzano Organic (30 Seeds)

The giveaway will start Wednesday, February 17th and will end Saturday, February 20th at noon.   


Botanical Interests Heirloom Tomato Seed Collection Giveaway

Sunday, January 24, 2016

Temperature Blanket 2016


Happy New Year to everyone (sorry I'm a few weeks late)!  I was going to hold off on posting this until the end of next year, but I have been loving this project so much that I wanted to share it will all of you now.  Have you seen the posts about temperature blankets floating around social media?  The thought behind it is that you crochet (or knit) a row every day.  The color can change daily and will be determined by the temperature at noon.  This project is EASY and is something everyone can do.  It takes me about 10-15 minutes a day to crochet my row and I look forward to it every day.

Below I've included the color key that I am using.  Even though we are almost through January, you still have plenty of time to get caught up and continue this awesome project throughout the year!

BEFORE GETTING STARTED!
Make sure that you are able to purchase ALL of the yarn for this project LOCALLY.  I started off using colors recommended by others who have made these blankets and was initially ordering them online.  BIG MISTAKE! The cost to ship these inexpensive balls of yarn is way too much and there is nothing worse than running out of yarn and waiting a week for it to be delivered.

I bought all of my yarn at Walmart and used Super Saver Economy Yarn by Red Heart.

If you're looking for a record of your past temperatures, WeatherUnderground has a great resource of temperatures by hour.

Have fun!


Friday, January 15, 2016

Tap My Trees Giveaway!

Giveaway begins Friday, January 14th at 12:00pm central time and ends Friday, January 22nd at 11:59 pm central time. Winner will be announced on Facebook Saturday January 23rd and contacted via the provided email. Good luck everyone!
This kit includes the following supplies:

  • 3 Aluminum (2 gallon) Buckets: Bucket is used to collect the sap as it drips from the spile. Made from aluminum with reinforced hole to hang bucket.
  • 3 Metal Lids: Lids prevent rain, snow, and foreign material from entering the bucket.
  • 3 Spiles: Stainless steel spile (tap) is inserted into drilled hole to transfer sap into the bucket
  • 3 Hooks: Hooks are attached to spile and used to hang the bucket.
  • Maple Sugaring at Home book: This guide provides step-by-step instruction (complete with pictures) to tap your maple trees. Includes information on how to identify your maple trees, how to tap trees, collection and storage of sap, uses for maple sap including how to make maple syrup, and frequently asked questions.
  • 1 Drill Bit: 7/16 drill bit with 3/8 shank used to drill tap hole into your maple tree.
  • Cheesecloth: Used to filter any solids (such as pieces of bark) when transferring sap from the collection bucket to a storage container.

You can view the full review and unboxing of the Sugaring Starter Kit HERE:

GOOD LUCK!

Enter Competition

Monday, August 24, 2015

YETI 20 oz. Rambler - Kevins Review

With Fall and Winter right around the corner I have been on the search for the perfect mug to keep my coffee warm when working outside or in the garage but more importantly while snow blowing.  The reason for this post is that I am quite certain I found one that suits my needs:  

Yeti rambler mug in freezer
Yeti Rambler 20 ounces

Let me first start with the back story.  I have a friend that swears by these Yeti mugs.  He owns both the 20 ounce Rambler (pictured here) and the 32 ounce mug.  Last night he was telling me how I need to get one and I won't be disappointed.  "Man, I don't know.  Its like $30 for a coffee mug." I told him  .  So I began to search online for a sale in hopes of filling my now obsession with this Yeti Rambler.  The stores that had it on sale were naturally out of stock.  I took that as a sign.  The next morning I get a text message that a local sporting goods store had them in stock and selling for $28.  Still steep but ok, I will indulge.  

Yeti rambler mug in freezer
Yeti Rambler in the freezer

Now home I need to justify this $30 (after taxes) purchase so into the freezing the Yeti Rambler goes.  For 20 minutes at a beginning piping hot 139.8 degrees F.  No way this mug is going to retain the temperature of my joe.

Yeti rambler mug in freezer
Yeti Rambler in the freezer after 15 minutes.  Lost 5 degrees but still piping hot.

Fifteen minutes in (which was my originally intended amount of time) we lost 5.4a degrees F.  Yet still piping hot.  I decided to go another 5 for good measure.

Yeti Rambler after 20 minutes in the freezer.  Absolutely a winner in my book!
Yeti Rambler after 20 minutes in the freezer.  Absolutely a winner in my book!

After twenty minutes in, it was time for coffee.  Overall I lost 7.4 degrees F in twenty minutes leaving my coffee still piping hot.  

Yeti Rambler Lid with gasket.
Yeti Rambler Lid with gasket.  

What is difficult to understand is this mug, unlike others, does not have an annoying lid that closes over the sip hole nor is that opening small.  Being that heat rises, I figured all if not most of the heat would have been lost through the hole in the lid.  

Everyday folks indulge on coffee and tea.  Why not indulge on the capsule we utilize to deliver it?  Yeti makes no claims in the marketing on this mug that it will keep your beverage hot.  Only that it will keep it cold.  I am impressed and would recommend it to anyone in the market.  And Yeti if you are reading this, we would love to do a thorough review on one of your chest coolers. *Hint  haha

Cheers! ~ Kevin

 Visit the Yeti website


Sunday, April 19, 2015

Our Homeschool Station


We have learned a lot throughout this homeschooling journey and one thing I most definitely am confident about is that a designated school room is just not for us. We had a beautiful room designated for schooling and I quickly realized that being in one spot wasn't working with two elementary kids.  They wanted to move around and sit in different areas and I started to get tired of shleping it all around the house.  Things quickly became scattered and disorganized and had me feeling pretty discouraged.  I tried a few other ideas that werent ideal but recently stumbled across this cart at our Sams Club.  I paid under 40.00 for it and it truly has been the solution to our needs.  I can roll it from room to room, even up to my desk so I can flip through my instructors guides and do my planning on the computer, and it holds everything we need for the day!

Thursday, April 2, 2015

Tree Tapping with Tap My Trees


It has been very busy around here as it usually is this time of year.  But as I promised before, I am going to give you a quick run down of the "how" to tap your maple trees using the Tap My Trees starter kit. I have been using this kit for a few weeks now and it has been working out great.  Once I get my pictures together off of my phone I will share with you how some of my friends have been doing this season and my boiling setup at home.

Drill bit included in the Tap My Trees starter kit.
Drill bit included in the Tap My Trees starter kit. 

Slowly drill on a slight downward angle about 2" deep into the tree.  I prefer to tap on the south facing side.
Slowly drill on a slight downward angle about 2" deep into the tree.  I prefer to tap on the south facing side.

Tap My Trees maple syrup spile and bucket hook
The relief cut or separation in the spile creates a seal around the hole you drilled.  Before you push it in, make sure to slip the bucket hook over the tapered end FIRST.

Tap My Trees maple syrup spile and bucket hook at downward angle
At this point your tap/ spile should look like this and aimed at a downward angle.


Tap my Trees maple sap spile and bucket
Hang the bucket over the hangar.

Tap my Trees maple sap spile and bucket Tap my Trees maple sap spile and bucket


tap my tree maple tree sap bucket lid how to
To attach the bucket cover you need to slide back the metal rod that goes through it enough to line it up with the holes on the spile.  Slide the rod back through to ensure your lid doesn't blow off into the wind. 


This is what the finished product should look like and let the sap collecting begin!  Make sure as the season progresses you check the level of sap collected in your buckets daily and either store in a cool place inside of a food safe container or go right at boiling it into your very own Maple syrup. Enjoy!


I would like to once again thank Jon McHale of Tap My Trees for providing us with the starter kit to review for our readers.  Already the friends of ours that have had the opportunity to see this in action have decided to purchase kits of their own after seeing the simplicity of the setting up.
Cheers!~ Kevin

To Contact Tap My Trees:

Jon McHale
Mail: Tap My Trees LLC, 268 Simpaug Turnpike Suite 125, Redding, CT 06896
Toll Free Telephone: (888) 990-9948 
Fax: (888) 666-9120


Saturday, March 28, 2015

Fancy Ladies!

About two weeks ago we hit the fancy chicken jackpot!  I have been wanting bearded silkies since before owning our very first chickens and despite going as far as hatching out our own "show quality bearded silkie" eggs, we were never able to find any (or hatch any) with a beard or one even close to resembling one....until now!  Let me introduce to you my new silkie girls as well as three other fancy pants that we picked up!

Bearded Silkie 

Bearded Silkie

Show Girl 

Millie Fleur D'Uccle

Gold laced polish 
They even got their own new house! 

Other Posts You May Like