Pages

Sunday, January 24, 2016

Temperature Blanket 2016


Happy New Year to everyone (sorry I'm a few weeks late)!  I was going to hold off on posting this until the end of next year, but I have been loving this project so much that I wanted to share it will all of you now.  Have you seen the posts about temperature blankets floating around social media?  The thought behind it is that you crochet (or knit) a row every day.  The color can change daily and will be determined by the temperature at noon.  This project is EASY and is something everyone can do.  It takes me about 10-15 minutes a day to crochet my row and I look forward to it every day.

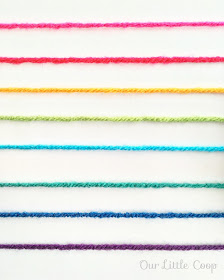
Below I've included the color key that I am using.  Even though we are almost through January, you still have plenty of time to get caught up and continue this awesome project throughout the year!

BEFORE GETTING STARTED!
Make sure that you are able to purchase ALL of the yarn for this project LOCALLY.  I started off using colors recommended by others who have made these blankets and was initially ordering them online.  BIG MISTAKE! The cost to ship these inexpensive balls of yarn is way too much and there is nothing worse than running out of yarn and waiting a week for it to be delivered.

I bought all of my yarn at Walmart and used Super Saver Economy Yarn by Red Heart.

If you're looking for a record of your past temperatures, WeatherUnderground has a great resource of temperatures by hour.

Have fun!


Friday, January 15, 2016

Tap My Trees Giveaway!

Giveaway begins Friday, January 14th at 12:00pm central time and ends Friday, January 22nd at 11:59 pm central time. Winner will be announced on Facebook Saturday January 23rd and contacted via the provided email. Good luck everyone!
This kit includes the following supplies:

  • 3 Aluminum (2 gallon) Buckets: Bucket is used to collect the sap as it drips from the spile. Made from aluminum with reinforced hole to hang bucket.
  • 3 Metal Lids: Lids prevent rain, snow, and foreign material from entering the bucket.
  • 3 Spiles: Stainless steel spile (tap) is inserted into drilled hole to transfer sap into the bucket
  • 3 Hooks: Hooks are attached to spile and used to hang the bucket.
  • Maple Sugaring at Home book: This guide provides step-by-step instruction (complete with pictures) to tap your maple trees. Includes information on how to identify your maple trees, how to tap trees, collection and storage of sap, uses for maple sap including how to make maple syrup, and frequently asked questions.
  • 1 Drill Bit: 7/16 drill bit with 3/8 shank used to drill tap hole into your maple tree.
  • Cheesecloth: Used to filter any solids (such as pieces of bark) when transferring sap from the collection bucket to a storage container.

You can view the full review and unboxing of the Sugaring Starter Kit HERE:

GOOD LUCK!

Enter Competition