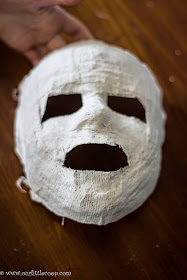
We had the best time this week making a plaster mask which was something I hadn't even done before! It was such an easy process and something I don't think I would have thought to do had it not been for our super creative Oak Meadow curriculum nudging us along! Here is how you can make it at home:
- Plaster cloth wrap. We found ours at Hobby Lobby for 8.99 with a 40% off coupon and we had enough left over to make at least 10 more masks. Well worth the money!
- Vaseline
- Paint, feathers, gems, anything your little one might like to decorate their mask with once it is dry.
- Hot glue gun
Here is how you make it:
Tightly pull back all hair and liberally apply vaseline to the entire face taking extra care around the hairline and eyebrows. This prevents the plaster from sticking to the child's face once it has hardened (we had absolutely no issues getting it off).
Cut your plaster cloth into strips of various sizes. I found that it was easier to cut them as we went along. Dip your cloth into a warm bowl of water and place on your child's face.
Cover your child's entire face except for their eyes (in some cases nose) and mouth. Allow the mask to sit for about 15 minutes so that it hardens. You will be able to feel the mask and tell when it is about done. At that point tell your child to make funny faces and with a little tug, the mask will pop right off.
The inside of our mask was not entirely dry so we placed it in the toaster oven on "warm" for about a twenty minutes.
Now is the fun part! Time to decorate!!
CLICK HERE TO SEE THE FINISHED PRODUCT!
CLICK HERE TO SEE THE FINISHED PRODUCT!


No comments:
Post a Comment
Thank you for your comment!