Pages

Saturday, March 30, 2013

A little variety of Microgreens!

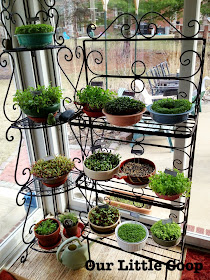
I shared this first picture of our family's micro green garden on Facebook and some of our readers were wondering what micro greens were in the picture. So as promised, all the varieties we currently have growing are pictured.  We find great fun in trying all of the types available and have learned some do grow and taste better than others.  Microgreen or (micro green) gardening is very easy to do and in most cases, you will be harvesting your crops in as little as 10 days.

gardening microgreen garden plants
Microgreen Garden
gardening microgreen garden plants sunflower
Sunflower Microgreens
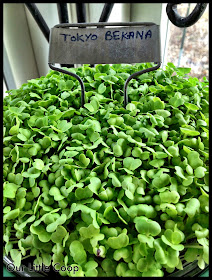
gardening microgreen garden plants tokyo bekana
Tokyo Bekana Microgreens 

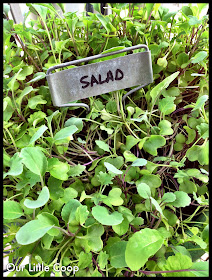
gardening microgreen garden plants basic salad mix
Basic salad mix Microgreens


Chia Microgreens

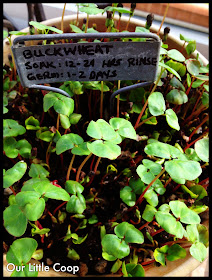
gardening microgreen garden plants buckwheat
Buckwheat Microgreens

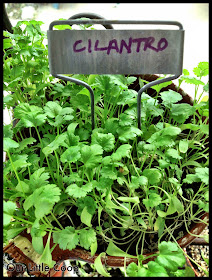
gardening microgreen garden plants cilantro
Cilantro Microgreens

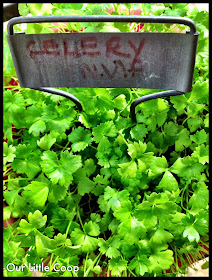
gardening microgreen garden plants celery
Celery Microgreens 
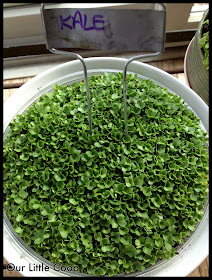
gardening microgreen garden plants kale
Kale Microgreens

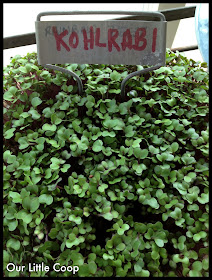
gardening microgreen garden plants kohlrabi
Kohlrabi Microgreens

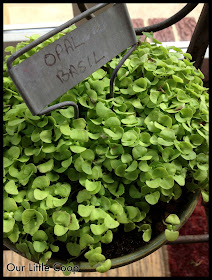
gardening microgreen garden plants opal basil
Basil Microgreens
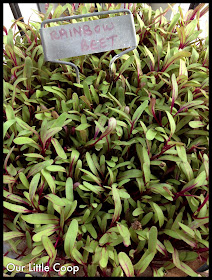
gardening microgreen garden plants rainbow beets
Rainbow beets Microgreens

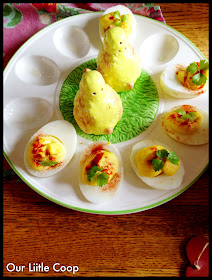
gardening microgreen garden plants celery deviled eggs
Microgreens are great tasting when eaten alone or can also be used to add a little flavor to a snack!

If you'd like to learn more about this fun and exciting form of gardening, please feel free to comment below!

If you need seeds, the best place we have found to deal with is Growing Microgreens.com
Their seeds have the best germination rate we had tried.

Cheers  ~ Kevin

Homemade Orange Cleaner


I have come across the recipe for homemade orange cleaner over and over again and I have tried and tried to save the peels of the oranges that we eat but have NEVER been successful in saving enough.  I end up tossing them.  Defeat.  I started juicing again a few weeks ago and while I was standing in the kitchen pealing dozens of oranges it dawned on me....this is my opportunity to finally make this amazing concoction!

DIRECTIONS:
So this is really easy. Put a ton of orange peels in a large mason jar, doing your best to fill it up to the top.  Then, pour white vinegar over the top of the oranges, filling it to the brim. Seal it up, tuck it away and allow the orange peels to marinate in the vinegar for as long as you possibly can stand it.  I have read that you should let it sit for at least a month but have also read that you're good to go in two weeks.    I have three of these jars made and still have a week (three if I can make it to the one-month mark) left before I can try this orange gold out!  When the time is up you pour the liquid into a spray bottle and clean away!  I will update as soon as have tried this out on everything I own :)


NOTES:

  • You can reuse the original orange peels an addition two times by repeating the process!
  • When your vinegar seems to get a little low during the marinating process, you can top it off.  
  • You can also use lemon or grapefruit peels (will have to try this!! 


Friday, March 29, 2013

Coop Hop #5


“Whatever we possess becomes of double value when we have the opportunity of sharing it with others.”

Join The Coop Hop!
Calling all bloggers, farmers, homesteaders, preppers, do-it-yourselfers and friends. We love sharing our journey with you and would love to invite you to share your journey with us. On Friday mornings we will be opening our blog for you to link your favorite blog post of the week to ours.  All of the blog links will be posted below and will allow for easy hopping from one "coop" to another!  Every week we will pick our favorite post and feature it on the following Coop Hop! 

RULES: There aren't any!
The post you choose to share can be about anything your heart desires so long as it is respectful and helpful to your fellow readers.  

How to Enter:

Below find "You are next…click here to enter." Click the link and fill out the form.  You're done! Now tell your friends and grab a button here to add to your blog so everyone can share and join in!

There were so many awesome entries in last weeks Coop Hop it was so hard to pick just one, but since we are focusing on spring cleaning this week at Our Little Coop and making so many homemade cleaning supplies of our own, we couldn't turn this one down! 

BLOG: Louise's Country Closet 
ARTICLE: Homemade Dishwasher Detergent Cubes
YOUR TURN!!

Thursday, March 28, 2013

Avocado Snack Bowl


If you're looking for a quick, filling and healthy snack look no further.  This my friends, was INCREDIBLE. 

Ingredients:
  • 1 ripe avocado 
  • 1 TBS raspberry vinaigrette dressing
  • 1 TBS feta cheese 
  • handful of basic salad mix microgreens 


Cut open your avocado and remove the pit.  This makes a perfect bowl for all of your ingredients!  

 Pour your raspberry vinaigrette dressing in. 

 Sprinkle with some feta cheese.

Top with "basic salad mix" microgreens.


ENJOY!


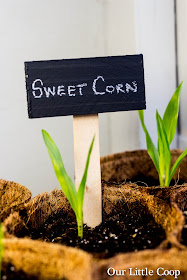
DIY Chalkboard Plant Signs

Yesterday I showed you how to make chalkboard seed markers and today we are going to take it up a notch and make some really awesome and cheap chalkboard plant signs. I've seen similar signs (although these are not quite as fancy) being sold in the stores for over $3.00 a piece!  These are ideal for single potted plants and can  withstand the elements so long as you label them with a china marker. 


What you will need:
  • jumbo craft sticks -as many as you will want markers. I bought a pack of 75 at Walmart for under $3.00
  • two x one-inch blocks of wood.  I used cut piece of lattice board.  Super cheap option! Cut as many blocks as you want signs.  
  • black chalk board paint if you want your markers to act as a true chalkboard or black matte acrylic if you just want the chalkboard look (I used chalkboard paint because I happened to have some in the house.  You can use either but the chalkboard paint is more expensive).
  • chalk if you use the chalkboard paint and want to be able to reuse the markers.  This option is only for use indoors as the chalk will wash away in the rain.  OR a china marker if you want your text to be permanent (I used a china marker). This option will work well on both the chalkboard paint and the acrylic and will not wash away if subjected to rain and watering. 
  • Hot glue gun or wood glue


Paint the front and sides of your wood blocks with chalkboard or acrylic paint.  Remember you only need to use the chalkboard paint if you are going to be using your signs indoors.  

Generously apply a big glob of hot glue to the top of your craft stick (doesn't Kevin look so manly with the tiny pink glue gun!?)

Quickly apply your craft stick to the BACK of your sign.  I just realized that this picture may be a bit confusing because I said only paint the front and sides....I painted the back on this one for some reason.  
Once the glue on your sign is dry, which only takes a few seconds, start labeling!  Remember, if you are using the signs outdoors use the china marker.  If you are using the plant signs indoors and want to use the chalk to mark them, make sure you use the chalkboard paint. You can use the china pencil on either chalkboard or acrylic paint and the signs will do great outside! 

Happy signing!  


Spring Cleaning Detailed Checklist!


Spring is FINALLY here and if you're anything like me, you are anxious to throw open all of the windows, light a little Nag Champa incense (actually...this may just be me) and begin your spring clean!  This year I decided to be a little more organized with my clean and developed a checklist to keep myself on track. Now don't get too overwhelmed.  Most of these tasks are small, do not take long to complete, but doing them will make a huge difference in the appearance of your home.  Focus on tackling one room per day, if you are up to it move to the next room, if not, take a break and start up again the next day.  You should be able to get through this list within a week or two and your house will thank you for it! Click below for your free printable! 


FRONT PORCH:


  • clean spiderwebs &  cobwebs 
  • sweep the porch
  • prune plants & bushes
  • clean porch furniture
  • wipe down light fixtures
  • wipe down banisters

  • prune plants & bushes
  • clean porch furniture
  • wipe down light fixtures
  • wipe down banisters

  • wash door 


ENTRYWAYS & STAIRS:


  • clean cobwebs
  • dust window sills
  • wipe down front door
  • wipe down switch plate
  • wash baseboards
  • straighten coat closet
  • dust staircase banisters
  • dust furniture
  • dust light fixtures
  • vacuum/sweep stairs and landings
  • vacuum/sweep floors & mop
  • wipe down mirrors 
  • launder machine-washable throws/rugs
  • wash walls 

  • wipe down door knob 
  • empty and organize coat closet 


DINING ROOM:


  • clean cobwebs 
  • dust windowsills
  • wash windows
  • straighten drawers 
  • polish dining room table
  • wipe down banisters

  • wipe down chairs
  • vacuum underneath furniture
  • wash baseboards 
  • vacuum/sweep floors & mop
  • wash doors 
  • clean chair pads (if applicable)
  • Dust displayed china or dishes 
  • launder window treatments 
  • shine silverware 
  • wash switch plates 
  • wash walls 


BEDROOMS:


  • change & launder sheets & pillowcases
  • straighten inside of night tables
  • dust surfaces
  • dust light fixtures
  • wipe switch plate 
  • vacuum/sweep & mop floors
  • clean trash cans 
  • polish furniture 
  • clean cobwebs 
  • wash mattress pad/dust ruffle
  • flip mattress (if applicable)
  • empty, clean and straighten drawers
  • vacuum under bed
  • straighten closet 
  • launder curtains 
  • clean windows
  • sweep closet floor 
  • wash vent covers and registers
  • wash doors
  • wipe down switch plates 
  • clean mirrors
  • wash base boards 
  • wash walls 


LAUNDRY ROOM:


  • wash windows 
  • wash cabinet doors 
  • wash laundry sink 
  • clean inside washing machine 
  • wash lint trap 
  • wash switch plates 
  • wash walls 
  • wash trim 
  • clean cobwebs 
  • wipe down the top of washer & dryer
  • wash doors 
  • wash floor registers 
  • sweep & mop floors 


HOME OFFICE:


  • dust surfaces 
  • dust light fixtures 
  • vacuum/sweep & mop floor 
  • straighten drawers 
  • wipe down electronics and screens
  • remove all clutter from desk 


LIVING ROOM:


  • throw away magazines and clutter
  • dust light fixtures
  • dust surfaces
  • vacuum upholstery and floor 
  • fluff and rotate couch cushions 
  • clean cobwebs
  • wash windows
  • straighten drawers
  • wash walls
  • vacuum/sweep floors & mop
  • polish furniture 
  • vacuum under cushions 
  • clean fireplace
  • vacuum under furniture 
  • spot clean couches 
  • wash baseboards 
  • wash windows 
  • dust tv screen and electronics 
  • wash switch plates 
  • wash baseboards 
  • wash floor registers 


BATHROOMS:


  • change and launder bath mats
  • deep clean toilet with cleaner 
  • wash shower doors
  • deep clean shower walls 
  • wash shower curtain 
  • wipe down cabinet doors 
  • empty, clean & straighten drawers
  • empty, clean & straighten cabinets
  • dust light fixtures
  • clean trash cans 
  • sweep floors & mop
  • clean mirrors
  • clean bathtub
  • wash baseboards
  • wash down walls
  • wipe down switch plates
  • shine faucets 
  • reseal grout if needed 
  • wash doors 
  • wash windows 


KITCHEN:

  • empty drawers, clean & organize 
  • empty refrigerator and deep clean
  • dust light fixtures
  • flush drain with boiling water
  • clean microwave 
  • clean stove & oven 
  • clean trash cans 
  • wipe down canisters on counter
  • clean & organize pantry 
  • empty cabinets, clean & organize 
  • wash windows 
  • wipe down cabinet doors 
  • clean under sink 
  • wipe down walls
  • clean pet bowls 
  • vacuum/sweep floors & mop
  • sharpen knives 
  • wash walls 
  • wash baseboards 
  • clean under appliances 
  • wipe down switch plates